
How Much Is a Bale of Hay? Hay Prices 2026
Hay bales can cost $10-$30 or $100-$250 depending on size of bale, type of hay, and location. If you have goats, horses, cows, rabbits, or chickens, hay is very important for their food and bedding. It's also a significant ongoing cost. But if you’ve ever tried to compare hay prices, you’ve likely noticed: it’s not simple. Costs vary widely by location, hay type, bale size, quality, and season.
This guide will help you understand:
- What determines the cost of a bale of hay
- Where to buy hay affordably
- The different hay types and bale sizes
- Proper hay storage
- How to reduce waste and stretch your hay dollars further
What Determines the Cost of a Bale of Hay?
Hay prices are influenced by a mix of supply, demand, regional climate, and transportation costs. A drought in one place or higher fuel prices can affect how much hay is available and its cost, even in other areas.
National Hay Price Averages (2026 Estimates)
Hay prices in 2026 continue to reflect regional variability, rising input costs, and strong livestock feed demand. While exact prices depend on location, hay quality, and time of year, the following national averages provide a realistic snapshot of what farmers can expect to pay this year:
- Small square bales (40–60 lbs) typically range from $8 to $15 per bale when purchased directly from producers, with higher prices possible at feed stores or during peak demand seasons.
- Large round bales (800–1,200 lbs) generally cost between $60 and $160 per bale, depending on weight, grass versus alfalfa content, and whether the hay is stored indoors or outdoors
- Large square bales (800–1,500 lbs) often sell in the range of $120 to $240 per bale, with pricing closely tied to quality grade and frequently calculated on a per-ton basis for commercial operations.
💡 Example: In Kentucky, small square grass hay bales average around $7.50. In drought prone areas like Arizona or California, that same bale might cost $12–$18 due to scarcity and trucking fees.
These updated 2026 price ranges reflect USDA hay market reports, regional auction data, and ongoing cost pressures such as fuel, labor, and transportation. Prices may trend higher in drought-affected regions or during late summer and winter months when forage supplies tighten.
(Source: USDA Market News Reports – Hay)
Where to Buy Hay Near Me
Prices fluctuate based on proximity to hay-growing regions, fuel costs, and your distance from producers. Here are your best bets for checking prices:
- USDA Weekly Hay Market Reports (updated by state)
- Facebook Marketplace – Great for connecting with local growers
- Craigslist > Farm & Garden – Search for “hay” and filter by location
- Local farm supply co-ops or ag extensions
- Farm groups on Facebook or forums like Homesteading Today
🔍 Search Tip: Try “alfalfa hay square bales near [your town]” or “round bale grass hay delivery [your state]” for local results.
📏 Sizes of Hay Bales & Their Impact on Cost
Common Hay Bale Sizes & Weights
(Source: USDA Market News Reports – Hay)
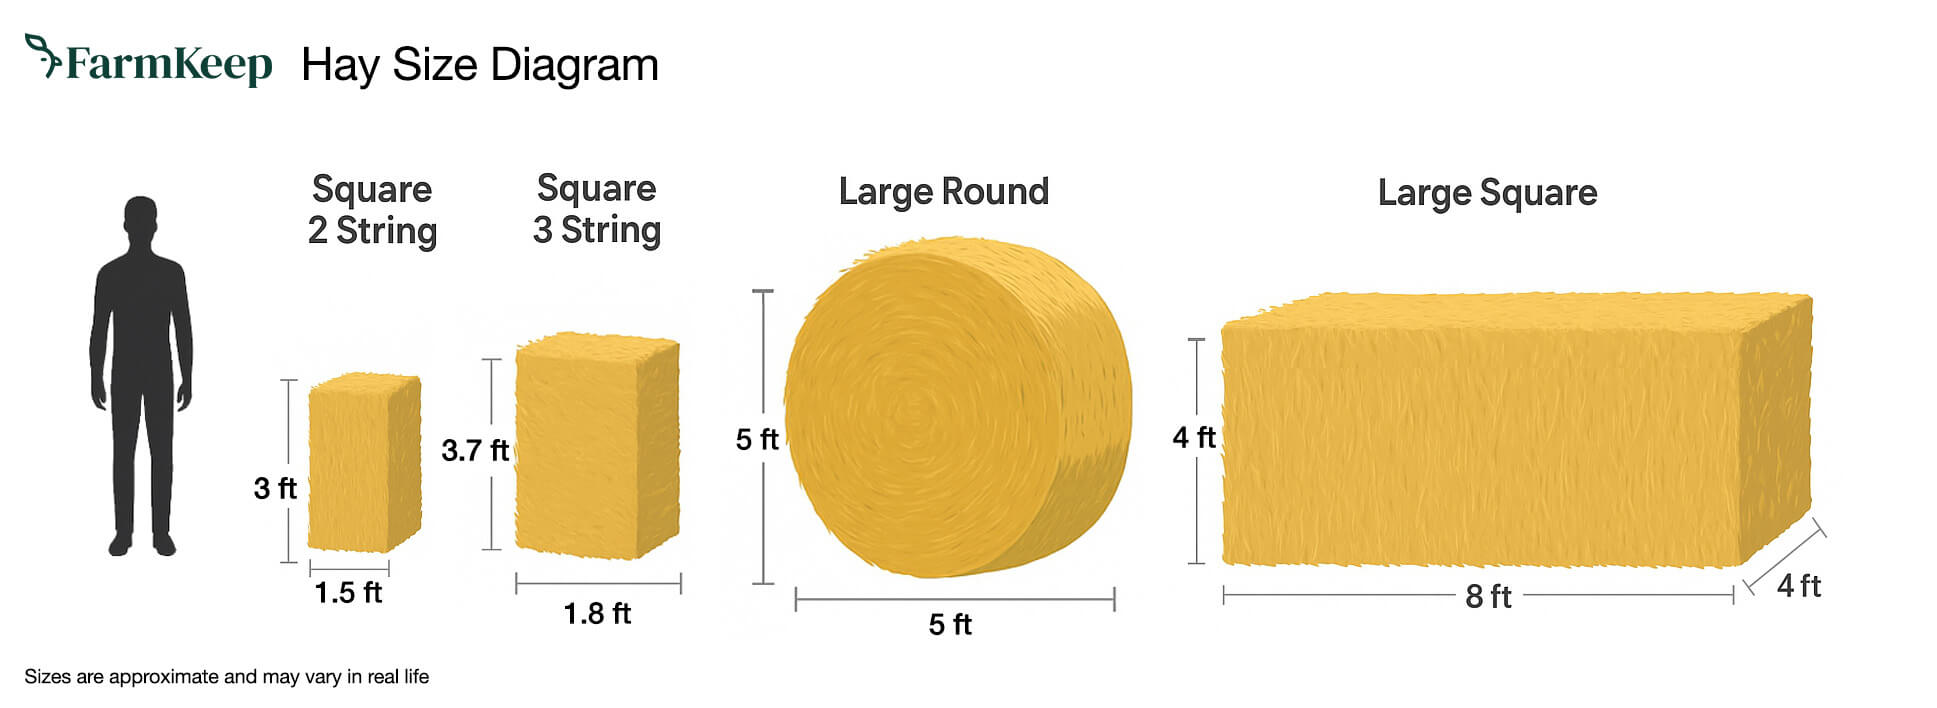
Round Bale vs Square Bale
Size affects cost per unit but not always per pound—buying in bulk often lowers your per-pound price. That said, small square bales are easiest to handle without equipment, ideal for small farms or daily feeding routines. Learn more about the different weights of hay.
Types of Hay (and What They're Good For)
When it comes to feeding livestock, not all hay is created equal. The nutritional needs of your animals will determine whether you choose grass hay, legume hay, or a mix of both. Factors like protein, fiber, and calcium levels can affect animal health. They can influence milk production, weight gain, and digestion safety. This is especially important for sensitive animals like rabbits and horses.
Hay is also classified by its cutting stage (first cut, second cut, or even third cut), which affects both texture and nutritional content. Let’s break it down.
Grass Hay – A Great Everyday Option for Most Livestock
Examples: Timothy, Orchard grass, Bermuda, Fescue, Ryegrass, Oat
Hay for livestock: grass hay is the go-to feed for animals that need high fiber and low protein, making it especially good for:
- Horses (especially easy keepers)
- Rabbits and small herbivores
- Poultry (as bedding or occasional forage)
- Goats and sheep (non-milking, dry does, and wethers)
Grass hay usually has less calcium and protein than legume hay. This makes it better for animals that are at risk for urinary or metabolic problems. It helps maintain healthy digestion thanks to its coarse stems and high fiber content.
- Timothy hay is particularly popular with rabbit owners and horse stables due to its consistency and low dust content.
- Orchard grass is a softer, more palatable option—ideal for picky eaters.
- Bermuda and fescue are warm-season grasses often used in the southern U.S.
Best for: Daily maintenance feeding for most animals, including horses, donkeys, rabbits, alpacas, and pet goats.
Legume Hay – Packed With Protein for Growth and Lactation
Examples: Alfalfa, Clover, Birdsfoot Trefoil
Legume hay is known for its high protein, calcium, and digestible energy, which makes it great for:
- Dairy goats and lactating sheep
- Growing kids and lambs
- Pregnant or underweight animals
- Chickens or ducks in molting season (as dried forage)
However, legume hay is too rich for animals that aren’t actively growing or producing—such as adult wethers, dry does, or easy-keeper horses. Feeding too much alfalfa can lead to issues like urinary stones in male goats or obesity in rabbits.
- Alfalfa hay is one of the most nutrient-dense hays and often used in goat dairies and commercial sheep operations.
- Clover hay is less common in bale form but offers similar benefits if mixed into pastures.
Best for: High-output animals needing extra calories and calcium. Use in moderation for others.
Mixed Hay – A Balanced Option for Small Farms
Examples: Timothy/Alfalfa, Orchardgrass/Clover
Mixed hay combines the protein-rich benefits of legumes with the fiber and digestibility of grasses—making it a great “middle-of-the-road” option.
- Ideal for dairy goats, alpacas, sheep, or horse herds that need a moderate protein boost without overloading calcium.
- Commonly found as timothy/alfalfa blends in many regions of the U.S.
Look for mixed hay labeled with exact percentages (e.g., “70% timothy / 30% alfalfa”) if you want to fine-tune your herd’s nutrition.
Best for: Multi-species farms or animals in moderate production/growth stages.
🔄 First Cut vs. Second Cut Hay – What’s the Difference?
The cutting of hay refers to when the grass or legume was harvested during the growing season:
- First cut hay tends to be more fibrous and filling, but less nutrient-dense.
- Second cut hay is generally more nutritious, softer, and preferred.
- Third cut (if available) is delicate, highly digestible, and typically best for small livestock or special feeding cases.
Pro Tip: When choosing hay, ask the seller for the cut and analysis report (many will have basic info on protein %, calcium, and moisture). If you’re feeding pregnant animals or milkers, this info can help you fine-tune their diet.
🐐 Tip: For goats, a mix of grass and alfalfa is ideal. For rabbits and horses, plain grass hay is safest long-term.
Learn more about the different types of hay.
Regional Hay Price Estimations
(Source: USDA Market News Reports – Hay)
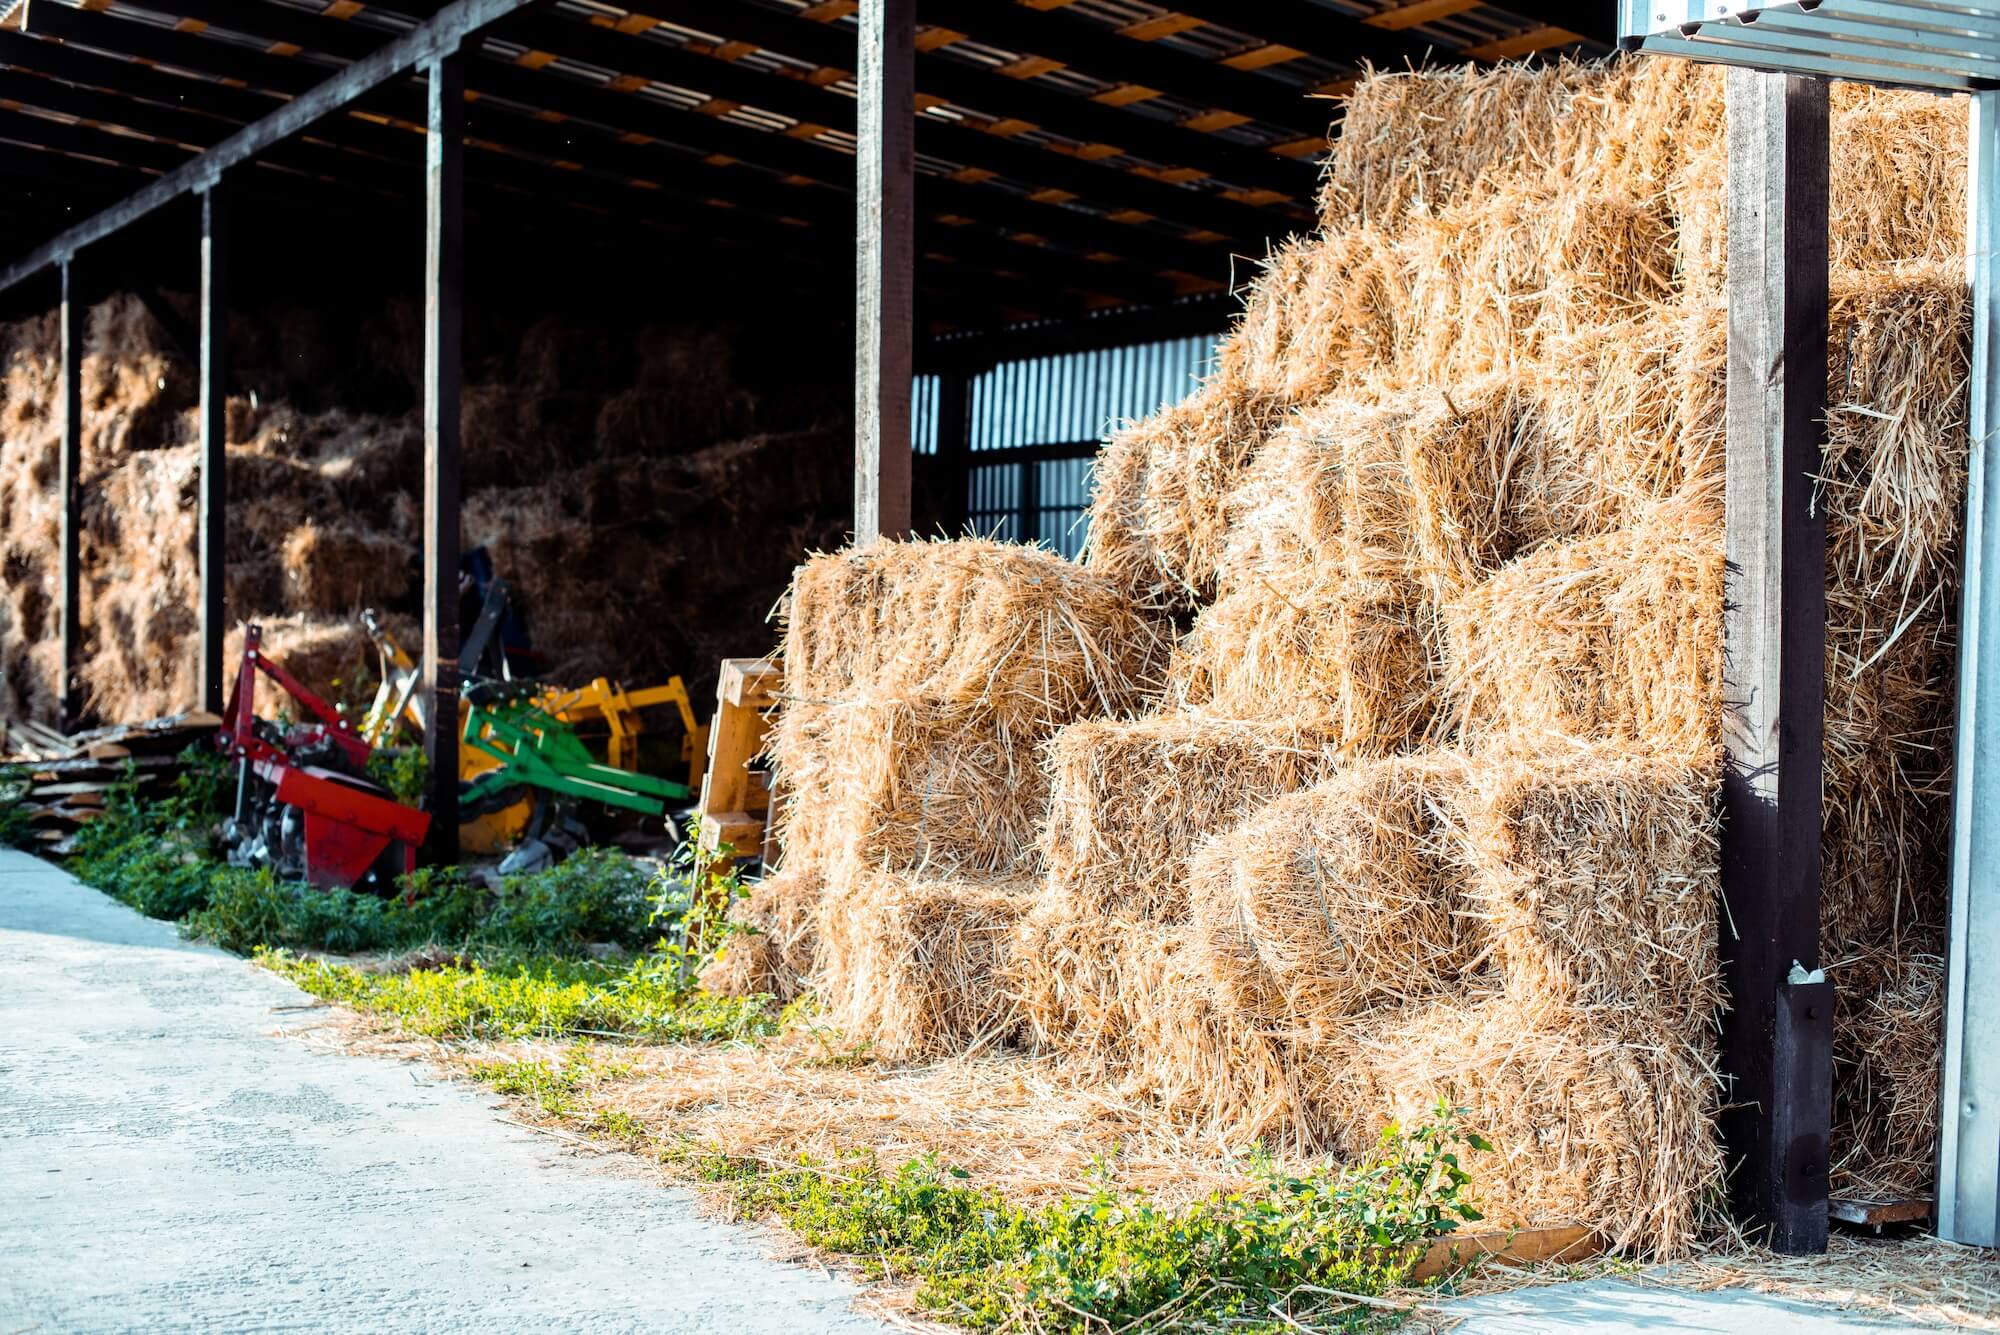
🧊 How to Store Hay So It Lasts
Hay Storage Tips
- Keep off the ground—use pallets or a hay loft
- Protect from rain and moisture—use tarps or store indoors
- Ensure airflow—prevent mold and condensation
- Rotate old hay out first ("first in, first out")
What Makes Hay Go Bad?
- Moisture: Causes mold, which can be toxic
- Rodents: Can contaminate hay with droppings/urine
- UV Exposure: Breaks down nutrients
- Age: Hay loses nutrition after ~1 year
🚫 Never feed moldy hay—it can cause respiratory or digestive issues in most animals.
What is Hay? How is Hay Produced?
Hay is a crop of grasses or legumes that is cut, dried (cured), baled, and stored for feeding livestock. Unlike straw, which is a byproduct of grain crops, hay is intentionally grown for nutritional value.
The Haymaking Process
Step 1: Planting Hay Fields
The process begins with planting hay crops, typically done in early spring or fall, depending on your region. Farmers pick between different types of grass, like timothy, orchardgrass, or bermudagrass, and legumes like alfalfa or clover. They can also plant a mix of both for better nutrition.
- Cool-season grasses like timothy and orchardgrass thrive in northern climates.
- Warm-season grasses like bermudagrass and fescue are better suited for the southern U.S.
- Alfalfa is a popular choice for dairy goats and high-protein diets, requiring well-drained soil and careful management.
Step 2: Growing to the Right Maturity
For hay to be nutrient-rich, it must be harvested at the optimal growth stage—usually just before blooming. Cutting too early reduces total yield, while cutting too late results in tougher, stemmy hay with less nutritional value.
- Grass hay is typically harvested just before heading out (seed formation).
- Alfalfa and clover are cut in the early bloom stage to maximize protein and leaf content.
Monitoring maturity is crucial for producing high-quality hay suitable for horses, rabbits, dairy cows, and other livestock.
Step 3: Cutting the Hay
When conditions are just right—typically warm, dry, and sunny—farmers use a hay mower or swather to cut the crop. The machine lays the hay down in long, even rows called windrows for uniform drying.
- Modern hay mowers often condition the hay by crimping or crushing stems to speed up drying.
- Cutting is usually done in the late morning, after dew has evaporated, to reduce moisture content.
Step 4: Drying (Curing) the Hay
Once cut, the hay is left in the field to cure under the sun for anywhere between 2 to 5 days, depending on weather. The goal is to reduce moisture to safe storage levels (under 15%) while preserving nutrient content.
- Farmers may rake the hay to turn it over and promote even drying.
- Proper drying prevents mold, spoilage, and fermentation, which can make hay dangerous for animals.
This step is weather-dependent: a surprise rainstorm can lower quality or delay baling.
Step 5: Raking and Baling
After curing, the hay is gathered into windrows using a hay rake. It’s then collected and compressed into bales using a baler—either round or square in shape.
- Small square bales are easy to handle and stack; popular on hobby farms.
- Large round bales are preferred for cattle operations due to volume and efficiency.
- Large square bales are commonly used for commercial hay operations or export markets.
The baler ties each bale with twine, wire, or net wrap to hold the shape and protect from rain and spoilage.
Step 6: Transporting and Selling the Hay
Once baled, hay is either:
- Stored on the farm under cover or in hay barns,
- Delivered to local feed stores or livestock operations,
- Or sold online through platforms like Craigslist, Facebook Marketplace, or local agricultural forums.
Some farmers also sell hay by the ton or bale directly from the field as “first-come, first-served,” saving on storage and labor.
(Source: Penn State Extension)
Fun facts:
- Hay can be made 2–4 times per year depending on the climate and species.
- There is a difference between hay and straw
💸 How to Save Money on Hay
Buy Direct from Farmers
Avoid retail markups at feed stores. Use Craigslist, Facebook Marketplace, or visit your county ag extension for local producer directories.
Buy in Bulk
Buying by the ton (round or large square bales) brings down price-per-pound—if you can store it properly. Find a friend or another farmer to split the bulk cost with to save money and storage space.
Barter or Trade
Offer goods or services (manual labor, eggs, firewood) in exchange for hay with neighbors.
Grow Your Own Hay
If you have land, you can grow and harvest your own grass or legume hay. Tools like a sickle bar mower, rake, and manual baler help small homesteads produce their own feed.
🧠 Bonus Tips
- Always ask about cutting date and moisture levels before purchasing
- Do a "flake check"—break open a bale to check for mold, weeds, or debris
- Ask if the hay was fertilized or treated with herbicides, especially for feeding rabbits or chickens
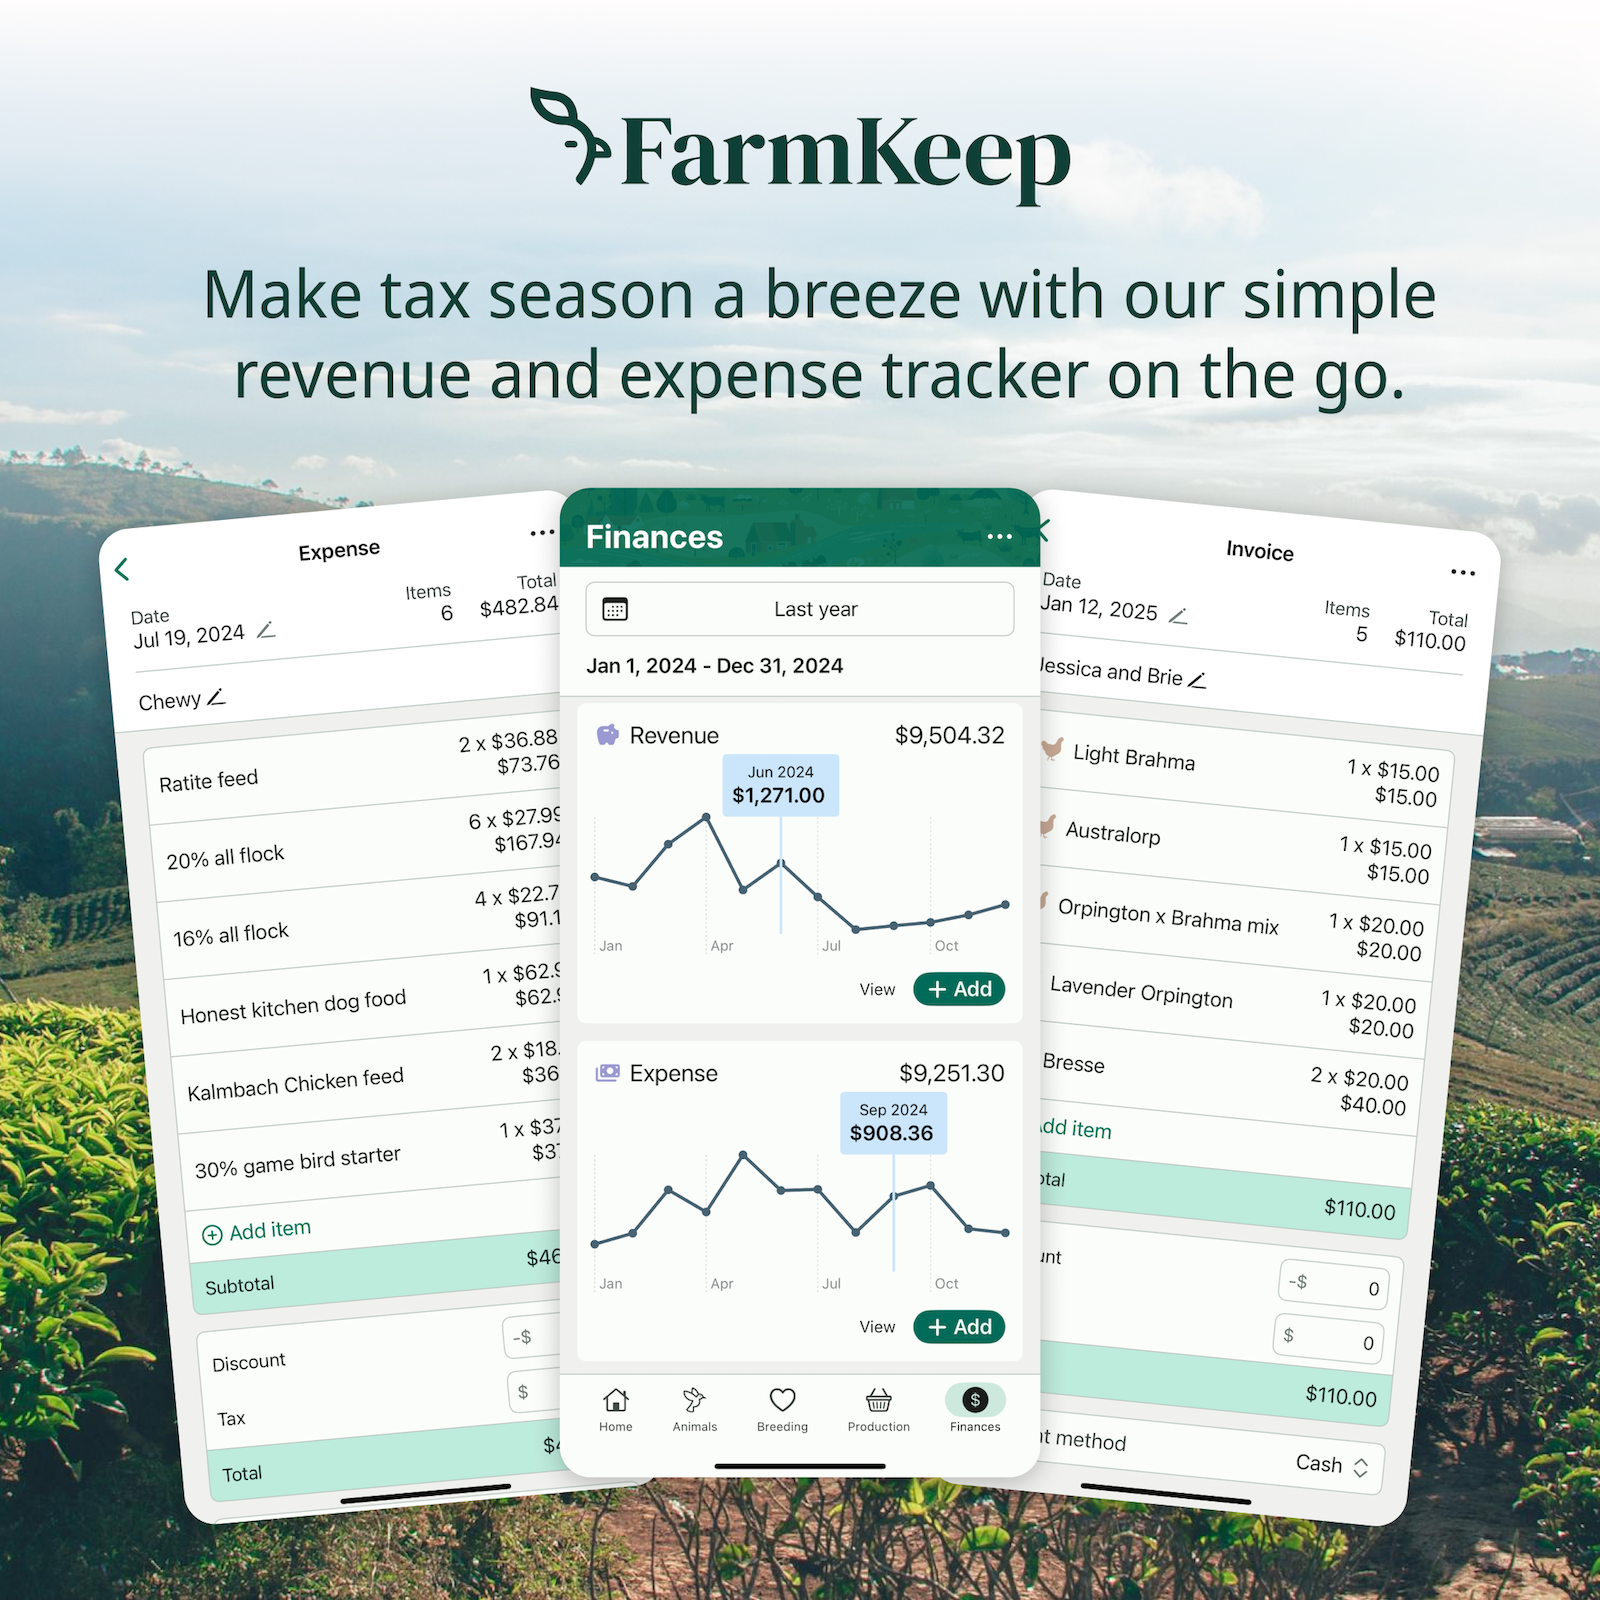
📲 Use FarmKeep to Track Hay Costs & Inventory
FarmKeep helps small farmers and homesteaders stay organized and save money by tracking:
- How much hay you buy and feed each week/month
- Track which animals eat the most (and when)
- Total spend on feed per species
- Create tasks to replenish your hay and reminders when your hay stockpile is running low
- Notes on suppliers, cutting quality, and delivery contacts
Download FarmKeep to start tracking your feed inventory and spending now.
🧾 In Summary
The cost of a bale of hay depends on what kind you buy, where you live, and how much you need. But with the right tools, savvy sourcing, and good storage, you can stretch every dollar further. If you have dairy goats, chickens, or cows, knowing about the hay market is important. It helps keep your animals healthy and your farm making money.

