
Incubating Peacock Eggs: A Complete Beginner-to-Pro Guide

Incubating peacock eggs, commonly called peahen eggs, requires precision and careful planning. Success begins with healthy breeding birds free from internal and external parasites, as egg quality depends on parental health. Gentle egg collection, proper selection, and strict control of temperature and humidity are essential, and a reliable incubator plays a critical role in maintaining stable conditions.
This article covers every critical element of successful peahen egg incubation, giving bird breeders a clear, practical path from egg collection to hatch day. Each step focuses on accuracy and consistency, helping you improve hatch rates, reduce losses, and produce strong, healthy peachicks.
How to Incubate Peacock Eggs Successfully (Step-by-Step)
Before placing eggs in the incubator, careful preparation lays the foundation for a successful hatch.
Step 1: Selecting Healthy Peacock Eggs for Incubation
Successful incubation begins with choosing the right peahen eggs.
- Select eggs laid by healthy, parasite-free birds with good nutrition and proper housing.
- Eggs should be normal in shape, free from cracks, thin shells, or deformities, and collected soon after laying to prevent contamination.
- Avoid eggs that are excessively dirty, unusually small, or misshapen, as these often have lower hatch potential.
Step 2: Cleaning and Storing Eggs Before Incubation
Here’s how to handle peahen eggs for a successful hatching day.
- Handle peahen eggs gently to protect the natural protective coating on the shell.
- Remove loose dirt with a dry cloth or soft brush rather than washing, as moisture can allow bacteria to enter the egg.
- Store eggs in a clean, cool area with moderate humidity, placing them with the pointed end down.
- Turn stored eggs once or twice daily and aim to set them in the incubator within 7–10 days for the best hatch results.
Incubation for Peacock Eggs: Natural vs Artificial Methods
Peacock eggs can be incubated using either natural or artificial methods, and each approach has its own advantages and limitations. The right choice depends on available resources, experience level, and the level of control a breeder wants over the process.
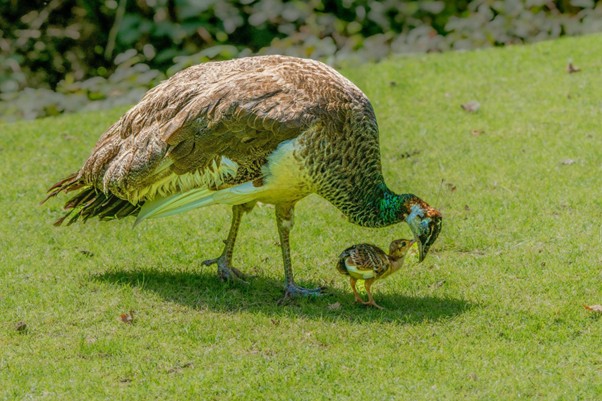
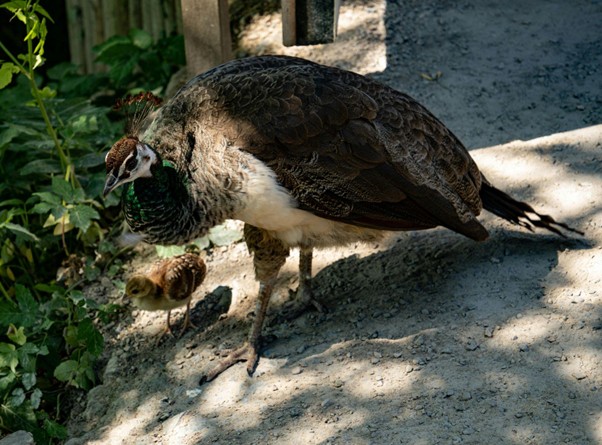
Natural Incubation (Using a Broody Hen or Peahen)
Natural incubation involves allowing a broody peahen or a surrogate broody hen to sit on eggs until they hatch. This method can work well when a reliable broody is available, as the hen naturally regulates warmth and turning.
However, not all peahens go broody consistently, and domestic hens may struggle to turn larger peafowl eggs correctly or maintain precise humidity, which can affect hatch rates. Natural incubation also leaves eggs exposed to environmental risks like predators, weather, and disease if not carefully monitored.
Artificial Incubation (Using an Incubator)
Artificial incubation offers predictable environmental control and is the preferred method for many breeders aiming for consistent results. With a good incubator, you can maintain precise temperature and humidity levels throughout the 28–30 day incubation period, typically around 99–100°F (37.2–37.5°C) with controlled humidity designed to support embryo growth.
Humidity is usually held at moderate levels during most of incubation and increased during the final hatching phase to prevent membrane drying and help chicks emerge. Since incubators offer stable conditions and avoid many of the variables affecting natural nests, they often deliver higher hatch rates and better overall control, especially for larger clutches or in commercial settings.
Artificial methods also make it easier to monitor development (such as candling), store fertile eggs properly, and manage multiple eggs at once. These advantages help breeders refine techniques and achieve consistent success.
Ostrich Egg Incubation Process and Tips for Healthy Hatchings
Peacock Egg Incubation Temperature and Humidity
Temperature and humidity are the two most critical factors in peacock (peahen) egg incubation. Even small deviations can affect embryo development, hatch timing, and chick strength. Maintaining stable conditions throughout the incubation period helps ensure healthy growth and successful hatching.
Ideal Incubation Temperature for Peacock Eggs
- Peacock eggs incubate best at a steady temperature of 99–100°F (37–38°C) in a forced-air incubator. Consistency is more important than hitting an exact number.
- Temperature fluctuations can slow development, cause deformities, or lead to late embryo loss.
- Always verify readings with a reliable thermometer and avoid frequent incubator openings, especially during the later stages of incubation.
Ideal Humidity Levels Throughout Incubation
- Humidity plays a key role in proper moisture loss from the egg. For most of the incubation period, humidity should remain around 55–60%, allowing the air cell to grow at a healthy rate.
- During the final few days before hatching (lockdown), humidity should be increased to 65–70%.
- Higher humidity at this stage prevents the membranes from drying out and helps chicks hatch without becoming trapped in the shell.
Careful control of both temperature and humidity creates a stable environment that closely supports natural development, greatly improving hatch success and chick viability.
Peacock Egg Incubation Chart (Day-by-Day Breakdown)
Days 1–7: Development Begins
- The embryo and amniotic sac begin to form.
- Blood vessels begin to develop, and the air cell slowly expands.
- Maintain stable temperature and humidity, and turn eggs regularly to support even growth.
Days 8–14: Growth and Vein Formation
- Veins become clearly visible during candling, and the embryo grows rapidly.
- Proper turning is essential to prevent the embryo from sticking to the shell.
- Remove any infertile or non-developing eggs.
- Feathers and scales begin to appear.
- The chick develops distinct features like a beak and claws.
- The yolk sac remains partially outside the body.
Days 15–24: Final Development
- The chick gains size and strength as internal organs mature.
- Reduce handling and avoid sudden changes in conditions.
- Ensure humidity supports steady moisture loss without drying the membranes.
- The chick is nearly fully grown, consuming protein and preparing for hatching.
- The yolk sac starts moving into the body cavity.
Days 25–28: Lockdown and Hatching
- Stop turning eggs and raise the humidity for lockdown.
- Chicks position themselves for pipping and hatching.
- Do not open the incubator during this period, as humidity drops can cause chicks to become shrink-wrapped.
Incubation Time for Peacock Eggs: What to Expect
- Peacock eggs typically take 27–28 days to hatch under proper incubation conditions.
- Minor variations can occur due to temperature consistency, humidity levels, and egg quality.
- During the final days, chicks may internally pip before breaking the shell.
- Avoid assisting unless absolutely necessary, as premature help can reduce hatch success.
Turning Peacock Eggs During Incubation
- Eggs should be turned at least 3–5 times daily to prevent the embryo from sticking to the shell membrane.
- Turn gently and consistently until day 24, then stop turning for lockdown.
- Always turn eggs at different angles and follow a regular schedule to support healthy embryo development.
Candling Process for Peacock Eggs: How and When to Do It
Candling lets you check whether peacock (or peahen) eggs are fertile and developing normally. By shining a bright light through the egg in a dark room, you can see internal structures like veins and the embryo, helping you remove unfertilized or dead eggs before they harm the rest of the clutch.
Best Days to Candle Peacock Eggs
- Around Day 14: This is the most common time to candle peafowl eggs to confirm development.
- Near Day 26–28 (Pre-lockdown): A second check before hatching helps catch eggs that have stopped developing.
- Avoid candling too often, as opening the incubator and removing eggs can disrupt temperature and humidity.
What You Should See When Candling
- Fertile & Developing Eggs: Visible blood veins and a darker central spot indicate life.
- Unfertilized Eggs: Translucent eggs with no visible structures mean no embryo. These should be discarded.
- Stopped Development: If blood vessels disappear or the egg looks unchanged, it may have died; you can remove it to protect others.
- When candling, keep eggs warm by working quickly and handling them gently to avoid disturbing the embryo’s development.
Common Peacock Egg Incubation Problems (and Fixes)
Here are some common peahen egg incubation errors and mistakes that you can avoid:
Low Hatch Rates
- Often caused by poor fertility, incorrect temperature, or unstable humidity
- Fix by selecting parasite-free breeders and using a calibrated incubator
Early Embryo Death
- Usually linked to temperature fluctuations or rough egg handling
- Keep the temperature steady and limit unnecessary egg movement
Late-Stage Deaths (Fully Formed Chicks)
- Commonly due to low humidity or poor ventilation during the final days
- Increase humidity during lockdown and ensure proper airflow
Malformed or Weak Chicks
- It can result from nutritional deficiencies in breeding birds
- Feed breeders a balanced diet with adequate vitamins and minerals
Sticky or Shrink-Wrapped Chicks
- Caused by low humidity near hatching
- Maintain high humidity during lockdown and avoid opening the incubator
Hatch Day: What Happens When Peacock Eggs Hatch
- Internal Pipping: The chick breaks into the air cell and begins breathing internally.
- External Pipping: A small crack appears as the chick starts breaking through the shell.
- Zipping: The chick slowly cuts around the shell using its egg tooth.
- Hatching: The chick pushes free, often after several hours of rest between efforts.
- Post-Hatch Rest: Newly hatched peachicks rest and absorb the yolk sac before becoming active
- Drying Period: Leave chicks in the incubator until fully dry and fluffed before moving them to a brooder.
How FarmKeep Helps You Track Peacock Egg Incubation
.png)
FarmKeep keeps your entire peacock egg incubation process organized in one place. Log egg collection dates, parent birds, fertility notes, and incubation batches from day one.
Easily record temperature, humidity, turning schedules, and candling results as incubation progresses. Track hatch outcomes and chick survival to see what works best and improve future hatch success with confidence.
FAQs
How long to incubate peacock eggs?
The incubation for peacock eggs typically takes 27–28 days under proper conditions.
What temperature should peacock eggs be incubated at?
The ideal incubation temperature for peacock eggs is 99.5°F (37.5°C) in a forced-air incubator.
How long does it take for peacock eggs to hatch?
Most peacock eggs hatch between Day 27 and Day 28, though some may take slightly longer. The entire incubation time for peacock eggs is 28 days.
What is the ideal incubation temperature for peacock eggs?
The ideal peacock egg incubation temperature is 99–100°F (37–38°C), with minimal fluctuations.
How long is the peacock incubation period?
The full incubation period averages 28 days from the start of incubation.
What humidity is best for peacock egg incubation?
Keep humidity around 50–60% during incubation, then raise it to 65–70% during lockdown. Managing the peacock egg incubation temperature and humidity is essential for a successful hatching.
How often should I turn peacock eggs during incubation?
Turn eggs at least 3–5 times per day to prevent the embryo from sticking to the shell.
When should I stop turning peacock eggs?
Stop turning eggs on Day 24, when lockdown begins.
Can I incubate peacock eggs with chicken eggs?
No, it’s not recommended. Peacock eggs require a longer incubation period and slightly different humidity management.
Why didn’t my peacock eggs hatch?
Common reasons include infertile eggs, temperature or humidity issues, poor breeder health, improper turning, or power interruptions during incubation.

